In this tutorial, we will learn how to implement social media login options (e.g., Facebook, Google) in a NestJS application, allowing users to authenticate and authorize using their social media accounts.
Prerequisites
Before getting started, make sure you have the following installed:
- Node.js
- npm
- NestJS CLI
Setting up a NestJS project
First, let's create a new NestJS project using the NestJS CLI:
nest new social-login-nestjs
cd social-login-nestjs
Next, install the required dependencies for Passport, OAuth2, and dotenv:
npm install @nestjs/passport passport passport-google-oauth20 dotenv
npm install -D @types/passport-google-oauth20
Create a .env file in the root of the project and add your OAuth2 provider's credentials (e.g., Google or Facebook):
In this example, we will be using Google as an OAuth2 provider
GOOGLE_CLIENT_ID=your_google_client_id
GOOGLE_CLIENT_SECRET=your_google_client_secret
GOOGLE_CALLBACK_URL=http://localhost:3000/google/redirect
To obtain the GOOGLE_CLIENT_ID and GOOGLE_CLIENT_SECRET, you need to create a project in the Google API Console and configure the OAuth 2.0 credentials. Follow these steps:
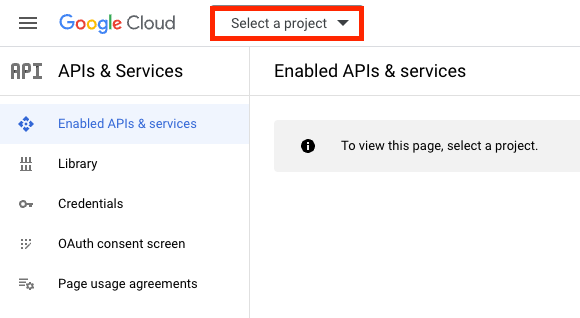
- Go to the Google API Console.
- If you have a Google account, log in; otherwise, create an account.
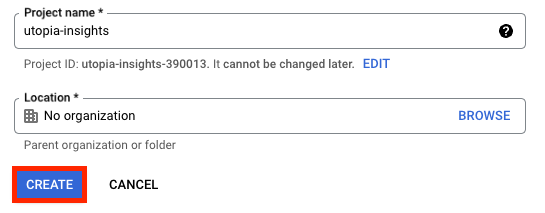
- Click on the "Select a project" dropdown at the top-right corner, then click on the "New Project" button.
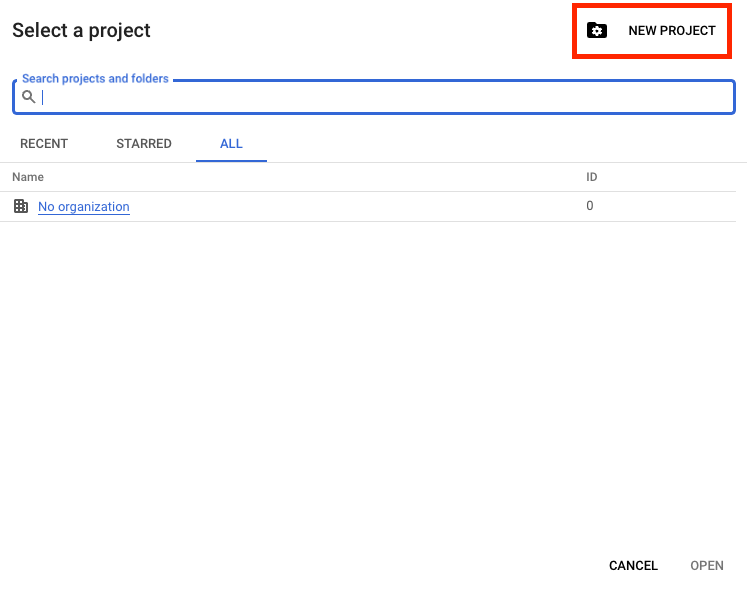
- Enter a project name, select an organization (if applicable), and click "Create."
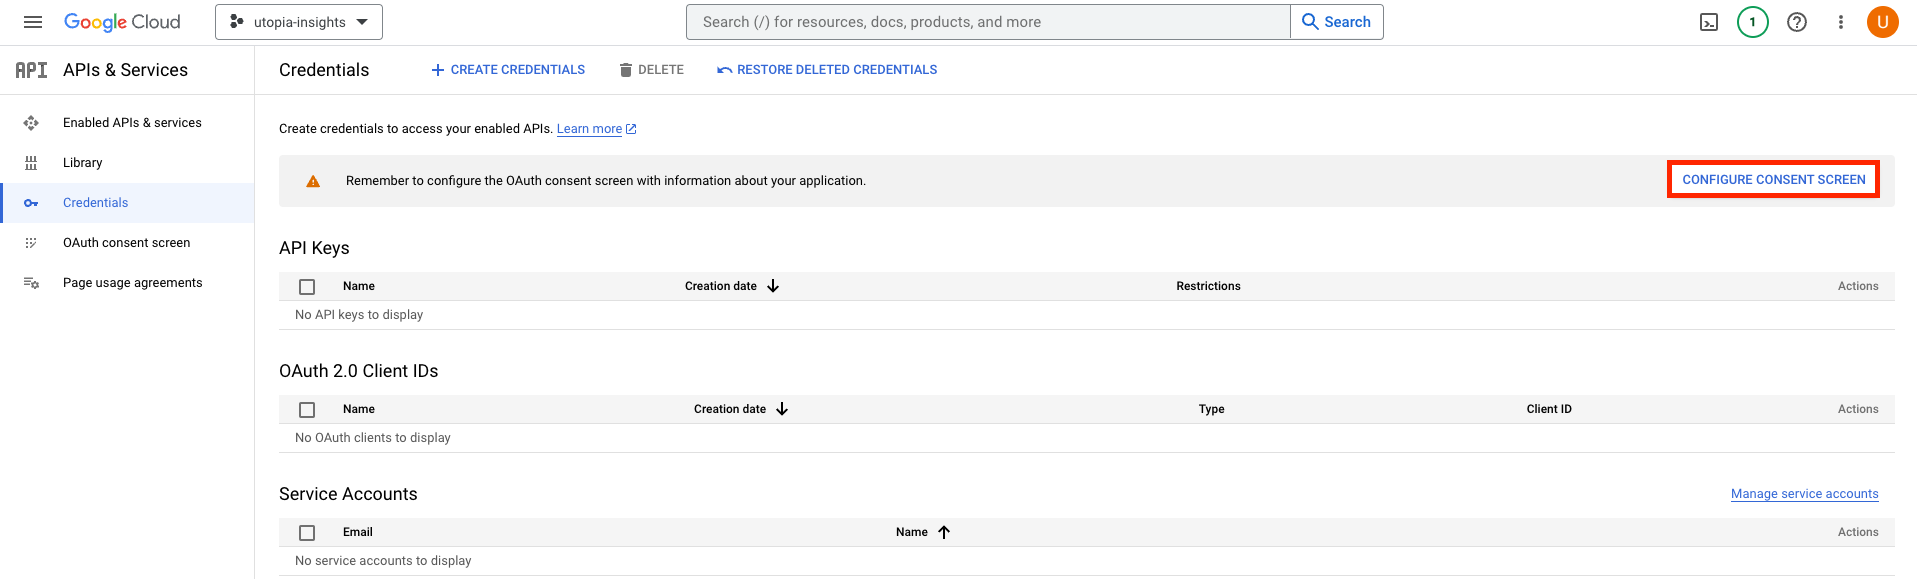
- In the Dashboard, click Configure Consent screen
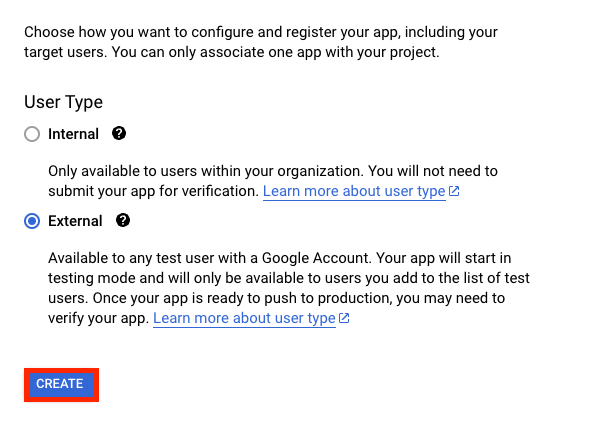
- Choose User type as External then follow the configuration steps by adding your application name and support email,
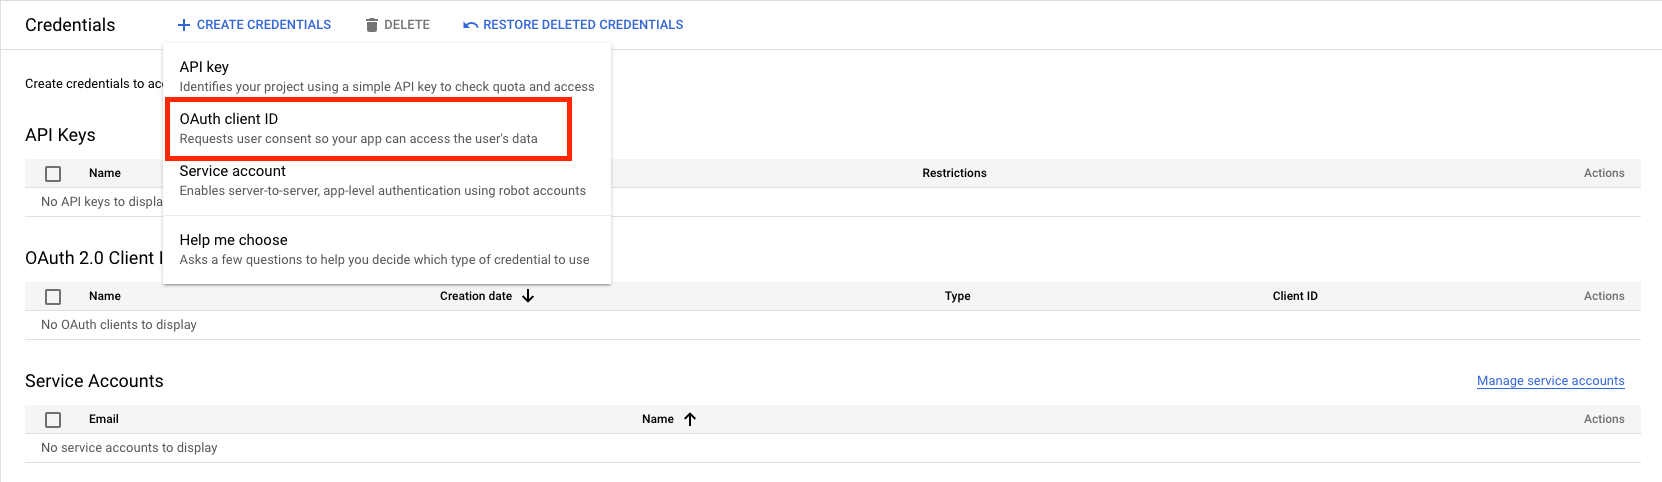
- After that, we go back to the dashboard and Select "OAuth client ID" under "Create Credentials"
- For "Where will you be calling the API from?", select "Web application."
- Enter a name for the OAuth client ID.
- Under "Authorized JavaScript origins," add the domain where your NestJS application is running (e.g.,
http://localhost:3000). - Under "Authorized redirect URIs," add the callback URL for your application (e.g.,
http://localhost:3000/google/redirect). - Click "Create."
After completing these steps, you will see a dialog containing your GOOGLE_CLIENT_ID and GOOGLE_CLIENT_SECRET. Copy these values and add them to your .env file as shown in the previous tutorial section.
Remember to keep your client secret private. If someone obtains your client secret, they could use it to consume your API quota, incur charges against your Google API Console project, and request access to user data.
Now back to our application, replace your_google_client_id and your_google_client_secret with the actual credentials provided by Google. If you are using another provider like Facebook, you will need to replace the variable names and values accordingly.
Setting up the OAuth2 Strategy
Create a file named google.strategy.ts in the src folder and add the following code:
import { Injectable } from '@nestjs/common';
import { PassportStrategy } from '@nestjs/passport';
import { Strategy, VerifyCallback } from 'passport-google-oauth20';
import { config } from 'dotenv';

config();

@Injectable()
export class GoogleStrategy extends PassportStrategy(Strategy, 'google') {
  constructor() {
    super({
      clientID: process.env.GOOGLE_CLIENT_ID,
      clientSecret: process.env.GOOGLE_CLIENT_SECRET,
      callbackURL: process.env.GOOGLE_CALLBACK_URL,
      scope: ['profile', 'email'],
    });
  }

  async validate(accessToken: string, refreshToken: string, profile: any, done: VerifyCallback): Promise<any> {
    const { name, emails, photos } = profile;
    const user = {
      email: emails[0].value,
      firstName: name.givenName,
      lastName: name.familyName,
      picture: photos[0].value,
      accessToken,
    };
    done(null, user);
  }
}
This code defines a GoogleStrategy class that extends PassportStrategy. It uses the OAuth2 provider's credentials from the .env file and sets the required scope for user information. The validate method is responsible for extracting and formatting the user information from the provider's response.
Setting up the Controller
Open src/app.controller.ts and replace its content with the following code:
import { Controller, Get, UseGuards, Req } from '@nestjs/common';
import { AppService } from './app.service';
import { AuthGuard } from '@nestjs/passport';

@Controller('google')
export class AppController {
  constructor(private readonly appService: AppService) {}

  @Get()
  @UseGuards(AuthGuard('google'))
  async googleAuth(@Req() req) {
  	return;
   }

  @Get('redirect')
  @UseGuards(AuthGuard('google'))
  async googleAuthRedirect(@Req() req) {
    return this.appService.googleLogin(req);
  }
}
This code defines two endpoints: /google and /google/redirect. The /google endpoint uses AuthGuard to authenticate the user with the Google strategy. The /google/redirect endpoint is where Google redirects users after they have been authenticated.
Setting up the Service
Open src/app.service.ts and add the following code:
import { Injectable } from '@nestjs/common';

@Injectable()
export class AppService {
  googleLogin(req) {
    if (!req.user) {
      return 'No user from Google';
    }

    return {
      message: 'User information from Google',
      user: req.user,
    };
  }
}
This code defines a googleLogin method that returns the user information obtained from Google.
Registering the Google Strategy
Open src/app.module.ts and add the GoogleStrategy as a provider:
import { Module } from '@nestjs/common';
import { AppController } from './app.controller';
import { AppService } from './app.service';
import { GoogleStrategy } from './google.strategy';

@Module({
  imports: [],
  controllers: [AppController],
  providers: [AppService, GoogleStrategy],
})
export class AppModule {}
Setting up JWT (JSON Web Token)
Now, your application is ready to handle social login with Google, but we will not stop here, after successfully getting the user information from Google, you might want to save the user to your database and generate a JWT (JSON Web Token) for subsequent requests, we can do that by:
Install the required dependencies for JWT authentication:
npm install --save @nestjs/jwt @nestjs/passport passport-jwt
npm install -D @types/passport-jwt
Setting up the JWT Module
Create a file named jwt.strategy.ts in the src folder and add the following code:
import { Injectable } from '@nestjs/common';
import { PassportStrategy } from '@nestjs/passport';
import { Strategy, ExtractJwt } from 'passport-jwt';
import { config } from 'dotenv';

config();

@Injectable()
export class JwtStrategy extends PassportStrategy(Strategy) {
  constructor() {
    super({
      jwtFromRequest: ExtractJwt.fromAuthHeaderAsBearerToken(),
      ignoreExpiration: false,
      secretOrKey: process.env.JWT_SECRET,
    });
  }

  async validate(payload: any) {
    return { userId: payload.sub, email: payload.email };
  }
}
Update your .env file to include the JWT secret:
JWT_SECRET=your_jwt_secret
Replace your_jwt_secret with a secure secret key (A random String of characters and symbols that you can generate or create).
Generating the JWT Token
Update the AppService class in src/app.service.ts to generate a JWT token for the authenticated user:
import { Injectable } from '@nestjs/common';
import { JwtService } from '@nestjs/jwt';

@Injectable()
export class AppService {
  constructor(private readonly jwtService: JwtService) {}

  googleLogin(req) {
    if (!req.user) {
      return 'No user from Google';
    }

    const payload = {
      email: req.user.email,
      sub: req.user.userId,
    };

    const jwt = this.jwtService.sign(payload);

    return {
      message: 'User information from Google',
      user: req.user,
      jwt,
    };
  }
}
Registering the JWT Strategy
Update src/app.module.ts to import the JwtModule and register the JwtStrategy:
import { Module } from '@nestjs/common';
import { AppController } from './app.controller';
import { AppService } from './app.service';
import { GoogleStrategy } from './google.strategy';
import { JwtModule } from '@nestjs/jwt';
import { JwtStrategy } from './jwt.strategy';

@Module({
  imports: [
    JwtModule.register({
      secret: process.env.JWT_SECRET,
      signOptions: { expiresIn: '1h' },
    }),
  ],
  controllers: [AppController],
  providers: [AppService, GoogleStrategy, JwtStrategy],
})
export class AppModule {}
Now, after a successful Google login, your application will return a JWT token that can be used to authenticate subsequent requests. You can store this token in your client application (e.g., web or mobile app) and send it as an Authorization header with each request to your protected API endpoints.
Testing the Application
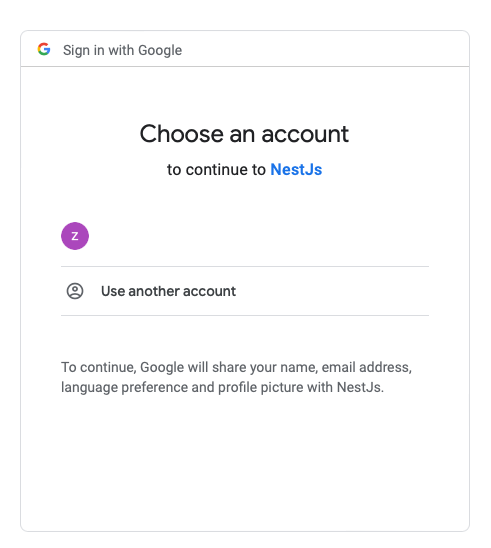
To test the social login implementation, open your browser and navigate to http://localhost:3000/google. You should be redirected to the Google login page. Sign in with your Google account, and you will be redirected back to http://localhost:3000/google/redirect. The page should display the user information obtained from Google.
You can also test the application using tools like Postman or Insomnia to send HTTP requests to the endpoints. However, since the authentication flow involves user interaction (logging in and granting permissions), it's more convenient to test it using a browser.
For a more comprehensive testing strategy, consider implementing various types of tests, such as unit tests, integration tests, and end-to-end tests. This will help ensure that your application works as expected and continues to work when new features or bug fixes are introduced.
And That's it!!! we demonstrated how to implement social login with Google in a NestJS application, test the application, and generate a JWT token after a successful login. This implementation can be further expanded to include other social login providers. Also, don't forget to save your JWT in the database.
You can find the source code for the tutorial project on Github.