After reading this you be able to implement rate limiting in your Next.js API using Upstash, a serverless database service for Redis. Rate limiting is a technique to prevent excessive requests from overloading your server or API. It can also help you avoid spam, abuse, and denial-of-service attacks.
What is rate limiting and why do i need it ?
Request limiting is a technique that helps you improve your API's performance, availability, security, and cost-efficiency. By setting a maximum number of requests that a user can make in a given time period, you can prevent your API from being overloaded by excessive or malicious traffic. This way, you can ensure that your API can serve all legitimate users with optimal speed and reliability, reduce the risk of denial-of-service (DoS) attacks, and control the usage and consumption of your API resources.
Why Upstash ?
Upstash is a serverless Redis service that provides low latency and high availability for your applications. It is especially useful for rate limiting and its easy to set up.
Upstash also has a pay-as-you-go pricing model, which means you only pay for what you use, also you can register for a free tier account with up to 10K commands per day and total 256Mb data size.
Step 1 : Setting up the Next.js project
We can start by creating our new Next.js project by running the command:
npx create-next-app@latest
I will be using the app router but this should work in pages folder just fine because we will be using Next.js middleware, and this is how my terminal look.

Your project directory should look something like this:
└── node_modules
└── public
└── src
│   └── app
We will create a new file in ratelimit-tutorial/src called middleware.ts. So your project should look like this:
└── node_modules
└── public
└── src
│   └── app
│   ├── middleware.ts
We will also create a simple API endpoint by creating a new route.ts file in ratelimit-tutorial/src/app/api like so:
└── node_modules
└── public
└── src
│   └── app
│   │   └── api
│   │   │   ├── route.ts
│   ├── middleware.ts
And this is what route.ts should look like:
import { NextResponse } from "next/server";

export async function GET(request: Request) {
  return NextResponse.json({message: "Hello World from our API endpoint"});
}
Now if we start the development server by running:
npm run dev
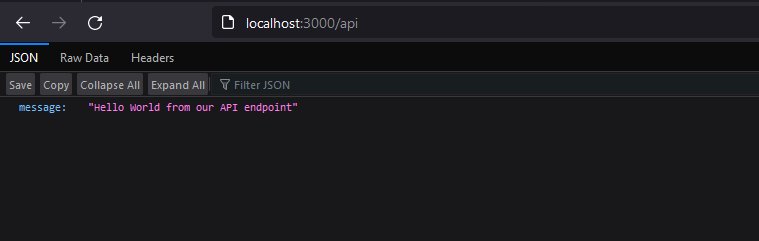
Then go to localhost:3000/api you should be able to see this:
For now this should be enough for our project setup.
Step 2 : Creating an Upstash account
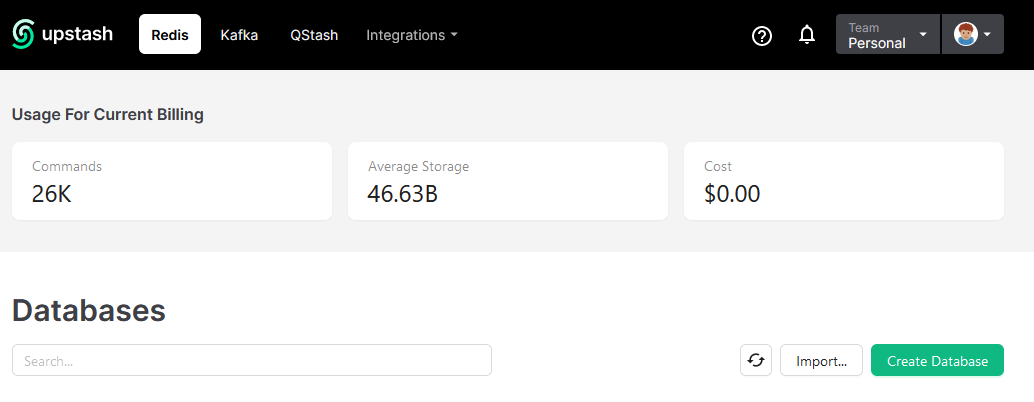
Head to Upstash website and create a new account by using your Github account or whatever suits you. Logging to your account and head to Upstash Dashboard :
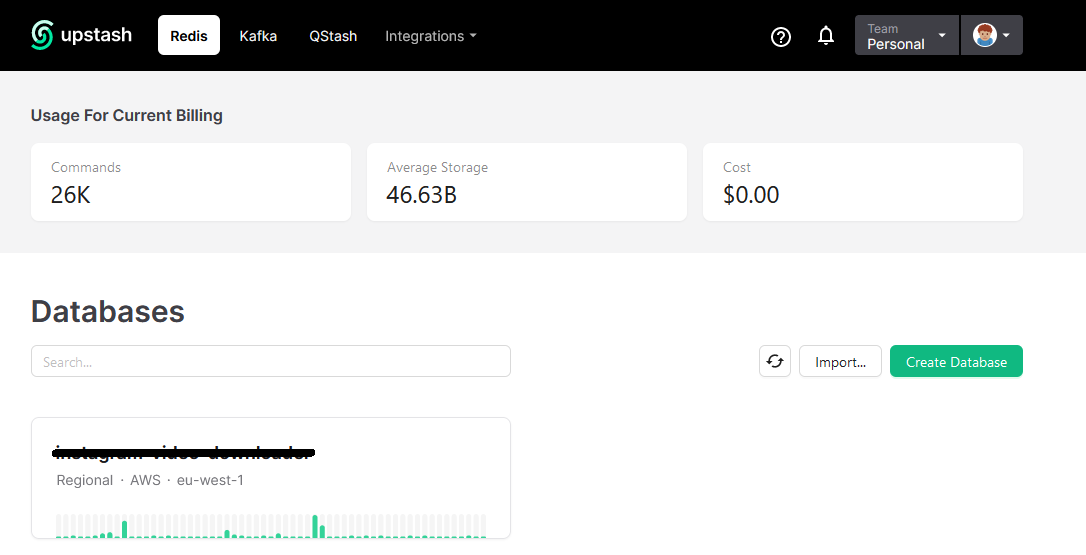
Select Redis on top and create a new database by pressing the button on the bottom right corner, you can name it whatever you want and after its created you should have it under Databases like so :
Step 3 : Implementing the rate limiting
Now we can finally start writing code but first we need to grab two important variables from Upstash by following these steps:
- Click on your database that you just created.
- Scroll down until you find the 'REST API' panel.
- Click on .env to reveal your database url and secret token.
- Copy the variables by pressing the button on the right side.
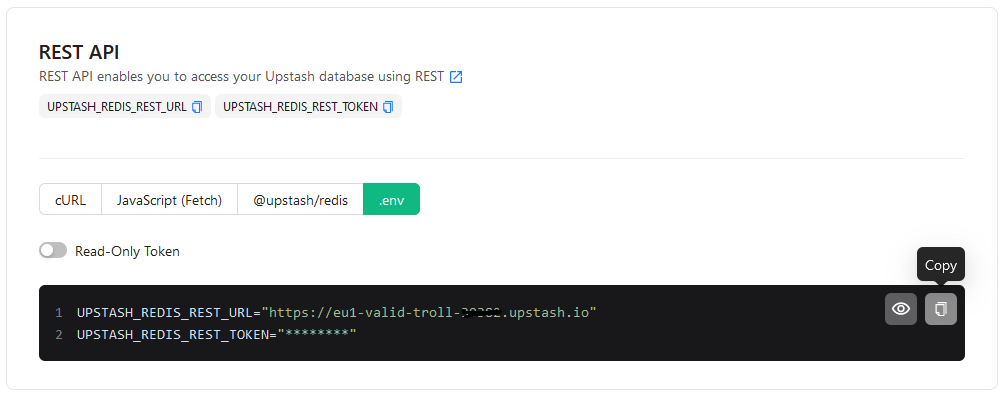
Now we go back to our project folder and create a new file .env.local in the root directory and paste the two variables. It should look something like this:
UPSTASH_REDIS_REST_URL="YOUR-UPSTASH-URL"
UPSTASH_REDIS_REST_TOKEN="YOUR-UPSTASH-TOKEN"
DO NOT share these variables with anyone or they will be able to use your database.
Our project should look like this by now:
└── node_modules
└── public
└── src
│   └── app
│   │   └── api
│   │   │   ├── route.ts
│   ├── middleware.ts
├── .env.local
We need to install two Upstash libraries that we shall be using to make our life easier and not have to worry about writing any complicated code.
First navigate to the project directory:
cd ratelimit-tutorial
Then we run the following command to install the required libraries:
npm install @upstash/ratelimit @upstash/redis
Now we head back to middleware.ts that we created at the start and paste the following code:
import { NextRequest, NextResponse } from "next/server";
import { Ratelimit } from "@upstash/ratelimit";
import { Redis } from "@upstash/redis";

const upstashRedisUrl = process.env.UPSTASH_REDIS_REST_URL;
const upstashRedisToken = process.env.UPSTASH_REDIS_REST_TOKEN;
if (!upstashRedisUrl || !upstashRedisToken) {
  throw new Error("Missing Upstash Redis variables in .env.local file");
}

const redisClient = new Redis({
  url: upstashRedisUrl,
  token: upstashRedisToken,
});

const maxAllowedRequests = 3;
const requestsDurationWindow = "1 m";

const rateLimiter = new Ratelimit({
  redis: redisClient,
  limiter: Ratelimit.slidingWindow(maxAllowedRequests, requestsDurationWindow),
});

const getClientIp = (request: NextRequest) => {
  let ip = request.ip ?? request.headers.get("x-real-ip");
  const forwardedFor = request.headers.get("x-forwarded-for");
  if (!ip && forwardedFor) {
    ip = forwardedFor.split(",").at(0) ?? null;
    return ip;
  }
  return ip;
};

export async function middleware(request: NextRequest) {
  const identifier = getClientIp(request);

  if (identifier) {
    const result = await rateLimiter.limit(identifier);
    if (!result.success) {
      return NextResponse.json(
        { error: `Too many requests, please try again later` },
        { status: 429 }
      );
    }
  }
}

// Match All paths starting with /api
export const config = {
  matcher: ["/api/:path*"],
};
And that's it !! your Upstash rate limiter is working. if we run the development server again:
npm run dev
And visit localhost:3000/api . If we try to spam refresh by pressing F5 we will get this response:
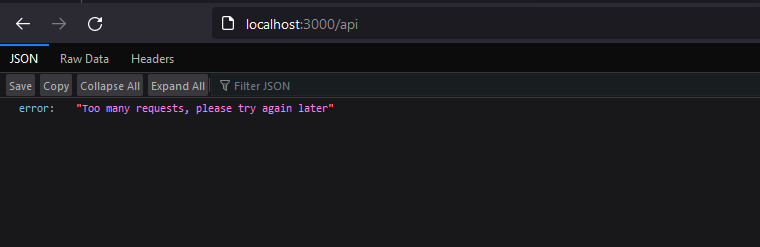
But you might ask, what is it doing exactly?
Our middleware will intercept requests to all paths starting with /api then we get the client IP address from the request using the function getClientIp and use it as an identifier. We send a request to Upstash with the identifier to check if the client has sent more than 3 requests in the past minute, if so the request is rejected and we return 429 TOO MANY REQUESTS.
Note that the identifier can be anything you want, for example you can use the user ID if you have authentication in your Next.js app.
How can I change the limitations?
You can choose how strict you want the limitation to be in the rate limiter:
const maxAllowedRequests = 3;
const requestsDurationWindow = "1 m";
maxAllowedRequests : determines how many requests are allowed.
requestsDurationWindow : is the window duration between these requests.
In the above example we are allowing 3 requests per minute.
You can check the full project code on Github.
If you would like to do more complicated stuff with Upstash you can visit their documentation Upstash Documentation.